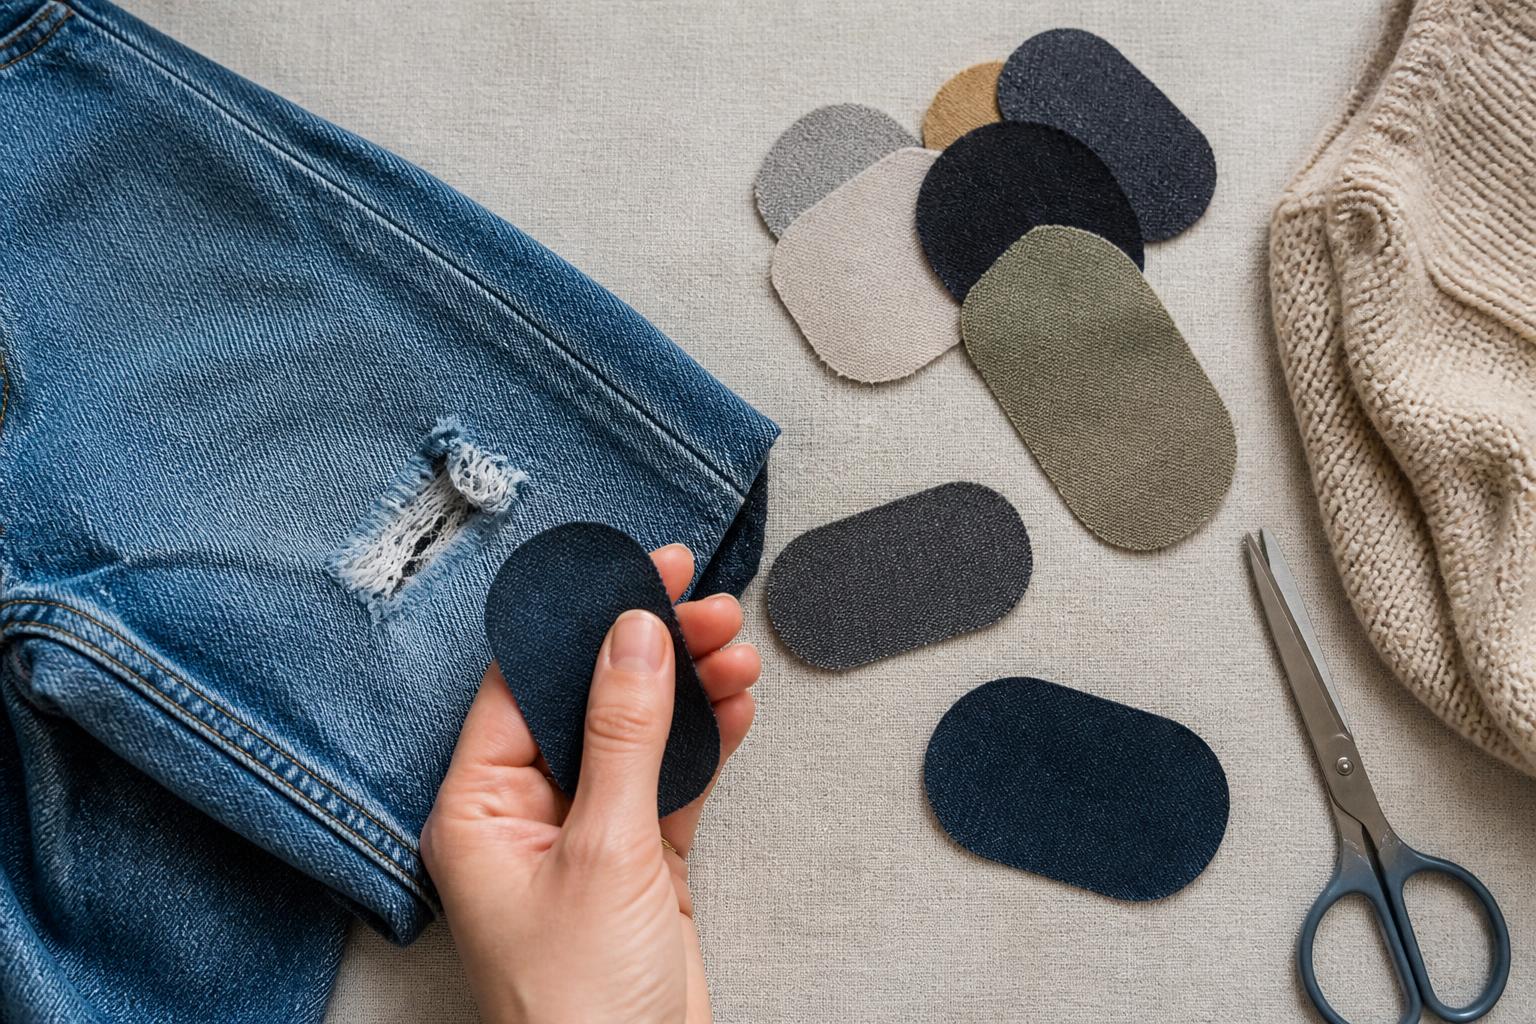
If you want a repair that lasts, the best patch is the one that suits the garment, the damage and the care routine the item already needs. A good patch should move with the fabric, survive washing and wear, and sit in a place where it is not fighting constant friction or stretch. A bad match can peel off, stiffen the area, pucker the cloth or simply tear the surrounding fabric a few weeks later.
That is why choosing clothing repair patches is less about buying the strongest option on the packet and more about matching method to fabric. A patch can be an excellent fix for a worn knee, a frayed pocket corner or a small hole caught early. It is less convincing when the cloth around the damage is already thinning all over, when the garment no longer fits properly, or when the repair area takes more strain than a patch can sensibly handle. If you are undecided, our guide on whether to mend it or move it on helps with that first decision.
What clothing repair patches do well and where they fall short
Patches work well when the damage is localised. That usually means one worn spot, one snagged area, one split seam allowance, or one high-friction point that has gone before the rest of the garment. Think children’s knees, shirt elbows, tote bag corners, work trouser pockets, or the start of wear at the inner thigh.
They are also useful when you need reinforcement as much as cover. A patch does not only hide a hole. It can spread strain across a wider area so the same spot is not taking all the stress. This is often the difference between a repair that lasts a season and one that lasts years.
Where patches fall short is when the surrounding fabric is already weak. If you can hold the cloth up to the light and see broad thinning around the hole, a patch may simply transfer stress to the next weakest point. The same applies if the fabric has gone brittle from age, sun damage, bleach, repeated hot washing or heavy tumble drying.
Fit matters too. If jeans are pulling hard across the thighs, or a shirt is straining at the elbows because the sleeves are too tight, a patch may only buy a little time. Constant tension will test any repair. In those cases, a size or style issue is part of the problem.
Patches are also not the best answer for every fabric. Fine silk blouses, very open weaves, heavily draping viscose and delicate occasionwear can be awkward to patch neatly without changing how the garment hangs. Sometimes darning, reweaving, a seam adjustment or a visible mend is more realistic.
As a rule, a patch is sensible when:
- the damage is contained
- the surrounding fabric still has strength
- the garment fits well enough not to overstress the repair
- the patch can be attached in a way that suits the care label
- you are happy for the repaired area to be slightly more visible or structured
How to match a patch to the fabric you are repairing
The patch should behave as closely as possible to the original fabric. Fibre content matters, but it is not the only thing to check. Weight, stretch, texture and use are often just as important.
Start with fibre. Cotton patch on cotton denim is usually straightforward. Wool on wool knitwear is often better than a synthetic patch, especially if you are sewing it in. For polyester school trousers or activewear, a synthetic or mixed-fibre patch may perform better because it tolerates similar wear and washing.
Next, match the weight. A heavy canvas patch on a lightweight shirt will drag and distort. A thin patch on thick work trousers will wear through quickly. Hold the patch and garment together in your hands. If one feels much stiffer or denser than the other, keep looking.
Stretch is the part people most often miss. If the garment stretches, the patch needs to stretch too, or at least not fight the movement. That matters for leggings, stretch denim, jersey tops and anything close-fitting. A non-stretch patch on stretch fabric often causes puckering at the edges and stress around the repair. For knitwear, a sewn patch in a similar knit or a carefully darned repair is usually better than a rigid iron-on.
Texture affects comfort and wear. A smooth patch inside trousers can be more comfortable than a rough one. On brushed cotton, corduroy or fleece, a patch with a very different surface may rub oddly or look more obvious than you want.
Then think about garment use. Elbows on a casual overshirt need a different approach from knees on children’s school trousers. A decorative patch may be perfectly fine on a weekend jacket, but for inner-thigh wear you usually want a low-profile repair with soft edges and good flexibility.
Useful matching principles are:
- denim, canvas and twill, use sturdy woven patches of similar weight
- jersey and stretch garments, use stretch patches or sew with stretch-friendly stitching
- knitwear, use knit patches or darning rather than stiff fusible patches
- outerwear, check whether waterproofing or coating will be affected by heat or needle holes
- delicate fabrics, choose the lightest viable repair and test first
If you have spare fabric from shortening hems or internal facings, that is often the best patch material because the match is exact.
Why the care label should decide your repair method
The care label should settle the method before you buy anything. If a garment cannot take the heat needed for an iron-on adhesive, an iron-on patch is the wrong choice however convenient it looks. If it is dry-clean-only, a washable stick-on patch may fail after the first professional clean.
Check four things on the label: washing temperature, ironing symbol, tumble drying and dry cleaning instructions. If you need a refresher, our guides on how to read clothes care symbols and how to read washing symbols without ruining clothes are worth keeping handy.
Washing temperature matters because adhesives soften and age differently. A patch that copes well at 30°C may not hold up to repeated 60°C washes. That is particularly relevant for school uniform, workwear, tea towels and anything washed hot for hygiene or heavy soil.
Ironing limits are crucial for fusible patches. If the label says cool iron only, or do not iron, you should assume a standard iron-on patch may scorch, shine or melt the fabric. Some synthetics, coated fabrics and performance materials are especially risky.
Tumble drying adds stress. Heat and repeated tumbling can loosen adhesive edges over time, especially on patches applied to curved or high-friction areas. If you regularly tumble dry, a sewn repair is usually more reliable than adhesive alone.
Dry-clean-only garments need extra caution. Solvents used in professional cleaning can affect some adhesives, and many patch products are not designed with dry cleaning in mind. In the UK, dry cleaning practices may vary by cleaner and fabric, so it is sensible to ask before repairing an expensive item. For tailored jackets, coats and occasionwear, a sewn patch or professional invisible repair is often the safer route.
One more care-label point, if the garment says wash inside out, follow that after patching too. It reduces abrasion on the repair.
Iron-on, stick-on or sew-on patches for everyday wardrobes
Each type has its place. The best one depends on fabric, wear level and how permanent you need the repair to be.
Iron-on patches are popular because they are quick and tidy. They work best on woven fabrics that can tolerate enough heat for the adhesive to bond properly, such as cotton drill, denim and some polycotton. They are useful for knees, elbows and general reinforcement. Their weakness is that heat-sensitive fabrics cannot take them, and the edges can lift over time with washing, tumble drying and friction. On hard-working garments, iron-on often performs better as a base layer that you then stitch around.
Stick-on patches are the most temporary option. They are handy when you need a fast hold before sewing, for a costume, or for a low-stress repair where no heat is possible. Some self-adhesive products are marketed as washable, but in everyday wardrobes they are usually the least durable choice, especially on flexible fabrics or areas that rub. We would not rely on them for inner thighs, children’s knees or anything washed frequently.
Sew-on patches are usually the most dependable. They suit the widest range of fabrics because they do not depend on heat. You can place them exactly, shape them to the damage and reinforce the edges properly. Their weakness is that poor stitching can pucker the garment or create new strain points. But if you want longevity, especially on workwear, denim, knitwear or dry-clean-only items, sew-on is often the strongest answer.
In practice:
- use iron-on for sturdy woven fabrics that can take heat, especially if you want speed
- use stick-on for short-term fixes or as a positioning aid, not as your default permanent repair
- use sew-on where durability matters, where heat is risky, or where the fabric needs a softer, more controlled repair
For heavy wear, combining methods often works best. A light fusible backing plus stitching around the patch can outperform either method alone.
How to repair common problem areas without making them worse
Knees need flexibility and coverage beyond the visible hole. Cut the patch larger than the damaged area so strain spreads out. Rounded corners are better than sharp ones because they are less likely to lift. For children’s trousers and denim, an inside patch often feels neater and catches less.
Elbows are similar but need attention to arm movement. Test the sleeve bend before fixing permanently. A patch placed on a flat sleeve can wrinkle once the arm bends. On shirts and lighter jackets, softer patches usually sit better than heavy ones.
Inner thighs are one of the hardest repairs because friction is constant. If the fabric is only just thinning, reinforce early from the inside rather than waiting for a full hole. Use a soft, lightweight but durable patch with some give, and stitch it smoothly to avoid creating a ridge that rubs. If both thighs are worn and the surrounding cloth is going thin, be realistic about lifespan. This is often a high-stress repair with limited returns.
Pockets usually fail at corners or where hands and keys pull repeatedly. Reinforcement is often more important than covering a hole. A small patch on the inside, plus firm stitching at the corners, can stop a split from spreading. If the pocket bag itself is torn, patch the bag fabric, not just the outer garment.
Small holes need different treatment depending on cause. If it is a clean puncture in woven cloth, you may only need a small backing patch and neat stitching. If it is in knitwear, a darn or duplicate stitch repair may be better than a patch. If moth damage is involved, check the rest of the garment carefully before spending time repairing one spot.
A few practical rules help avoid making things worse:
- trim loose threads, but do not cut away stable fabric unnecessarily
- do not pull a hole closed tightly before patching, or the area will pucker
- support weak fabric beyond the hole, not only the hole itself
- avoid very dense stitching on fragile cloth, which can perforate it
- on bulky fabrics, grade or trim seam allowances within the patch area if needed
What to check before and after patching a garment
Before patching, wash or clean the garment as the label allows. Dirt, body oil and detergent residue can stop adhesive bonding and make stitching less secure. If the item is dry-clean-only, do not improvise with a hot iron at home.
Then inspect the whole area. Is the damage local, or is the fabric generally worn? Is there enough sound cloth around it to anchor a patch? Does the garment still fit well enough to stop the same issue recurring straight away?
Next, test the method. If you are using heat, test on an inside hem or seam allowance first. If you are sewing, check thread tension and stitch length on a similar scrap if possible. If you are using an adhesive product, read the instructions fully. Bonding time, steam settings and cooling time matter.
Placement is worth slowing down for. Put the garment on, if practical, or shape it as worn. Mark the damaged area and make sure the patch will sit correctly when the fabric is under normal tension. On symmetrical wear points like knees, you may choose to reinforce both sides at once.
Edge finishing affects lifespan. Rounded patch corners are less likely to catch. Stitching close to the edge helps stop lifting, but do not sew so close that the edge frays away. On woven patch fabric, turning under the edge can give a neater finish, though it adds bulk. On internal patches, a zigzag or similar edge stitching can help secure raw edges if the fabric frays.
After patching, leave the repair to set if adhesive was involved. Do not wash it immediately unless the instructions specifically allow that. For the first few washes, turn the garment inside out and avoid the hottest settings the item can technically tolerate if the repair does not need them.
Ongoing care makes a difference. Repaired garments benefit from a little less friction and heat where possible. Wash only as often as needed, close zips before laundering, and do not keep tumble drying a repair that is already working hard. If the area starts to lift or thin again, deal with it early. Small maintenance is easier than a second major mend.
Good clothing repair patches are not magic, but they are useful when chosen with the fabric and care label in mind. If you match the patch to the garment, reinforce before damage spreads, and avoid methods the fabric cannot tolerate, a repair can be practical, affordable and surprisingly long-lasting.

Questions about this article or a correction to suggest? Get in touch. Read more about our editorial approach.